Guides
How to hang lights in a garage shop
Hang 4 ft LED shop lights in evenly spaced rows running across the bay, about 4,000 lumens per fixture. A 12 x 20 ft garage needs about 23,500 lumens, or 6 fixtures, for general work at 50 footcandles; a 22 x 22 ft garage needs 12; a 24 x 24 ft needs 15. Put the rows beside the work, not over it, mount to joists or blocking, and keep every fixture clear of the garage door and its track.
How many lights does a garage workshop need?
A garage workshop needs about 50 footcandles for general work and 100 for detail work such as layout, joinery and soldering. Footcandles are lumens per square foot at the work surface, so the number of fixtures comes from the floor area, the target and how much light the room wastes. The calculator on this site uses a coefficient of utilization of 0.6 for average walls and a light loss factor of 0.85, which are rules of thumb from the lighting trade, labeled CONVENTION in the standards file. The formula is lumens needed equals footcandles times floor area divided by (0.6 times 0.85).
| Garage | Floor area | General (50 fc) | Detail (100 fc) |
|---|---|---|---|
| 12 x 20 one-car | 240 sq ft | 23,529 lm, 6 fixtures | 47,059 lm, 12 fixtures |
| 12 x 22 one-car | 264 sq ft | 25,882 lm, 7 fixtures | 51,765 lm, 13 fixtures |
| 20 x 20 two-car | 400 sq ft | 39,216 lm, 10 fixtures | 78,431 lm, 20 fixtures |
| 22 x 22 two-car | 484 sq ft | 47,451 lm, 12 fixtures | 94,902 lm, 24 fixtures |
| 24 x 24 two-car | 576 sq ft | 56,471 lm, 15 fixtures | 112,941 lm, 29 fixtures |
| 32 x 24 three-car | 768 sq ft | 75,294 lm, 19 fixtures | 150,588 lm, 38 fixtures |
Fixture counts assume 4,000 lumens per 4 ft fixture. A fixture listed at 9,000 lumens cuts the count by more than half, but fewer, brighter fixtures leave more shadow. White walls and a white ceiling raise the utilization factor, so painting is the cheapest lighting upgrade: in the 12 x 20 ft bay, white walls drop the general-work count to 6 and in a 22 x 22 ft bay to 11. Dark paint or unfinished studs go the other way. The shop lighting calculator lets you enter your own area, target and fixture lumens, and the per-garage pages such as lighting for a 22 x 22 two-car show the same table for each bay.
Read the lumens, not the watt equivalents
Shop light listings lead with "250W equivalent" claims. Ignore them and read the lumens. The hykolity 4 ft LED shop light is listed at 42 W and 4,400 lumens in 5000K daylight. The BBOUNDER 4-pack is listed at 40 W per fixture and linkable. The ELEKICO 6-pack is listed as 60W, 9000LM and 5000K in its title; check on the listing whether the lumens are per fixture or per pack. The POLARPRA garage ceiling light is listed at 32,000 lumens in 6500K. Lumens per watt (efficacy) is the real comparison: divide the listed lumens by the listed watts and pick the higher figure if the lumens are what you need.
Color temperature is the other number. 5000K is a neutral daylight white that makes wood and metal look true. 6500K is bluer and harsher, good for a bare concrete garage but tiring over hours. If you do finishing work or color matching, look for a high CRI (color rendering index) on the listing; if the listing does not state one, treat it as unknown. Dimmable or switchable fixtures let you cut the output when you are not doing detail work, which is a comfort and not a necessity.
Where do the rows go?
Run rows across the narrow dimension of the bay, so each row is a short line of fixtures wired or linked end to end. For a 12 ft wide one-car bay, a row is three 4 ft fixtures end to end with 12 ft of light across the width. The 12 x 20 ft garage then takes two rows, about 10 ft apart, which is the six fixtures from the table. Aim for row spacing not much greater than the ceiling height times 1.2 to 1.5, which is 10 to 12 ft at an 8 ft ceiling. A 22 x 22 ft garage with 9 ft ceilings takes three rows of four, about 7 ft apart.
Then adjust to the work. Light should come from beside and in front of the operator, not from behind, or your body casts a shadow on the work. Put a row directly in front of each bench so the bench top sees light from above and slightly forward, and add one fixture under the wall cabinets or shelf in front of the bench to remove the shadow in the corner. For a table saw, the lights should be on both sides of the blade path; a single row overhead casts a shadow of the blade guard onto the cut line.
Vehicles are part of the lighting plan. A parked car blocks light, and the door open on the car side creates a shadow strip. Put at least one row over the car side of the bay so you can see to load and unload, and keep another over the work side. A third row near the garage door lights the apron, which is where you roll machines out. The layout guide shows how the zones sit against the car.
Lights and tools for the job


Prices change often; the button shows today's price on Amazon.
How do you mount garage shop lights?
There are four common ways, from easiest to most permanent.
- Chain or cable hanging. Most linkable 4 ft fixtures ship with a chain or hook set. Screw ceiling hooks into the bottom of the joists, hang the fixture at the height you want, and plug it in. This is the easiest option for a garage with exposed joists, and it works well in a rental because it leaves only screw holes.
- Surface mount. Screw the fixture directly to the joist or to blocking between joists, for a finished ceiling. Use screws long enough to bite at least 1 in into the framing; drywall alone will not hold a fixture.
- Linked rows. Linkable fixtures plug end to end, so one plug feeds a row. The listing gives the maximum number you can link and the total wattage; do not exceed it.
- Hardwired. An electrician wires fixtures to a switched circuit, which gives you a wall switch with no cords. It is the cleanest solution for a permanent shop.
Garage doors are the main hazard. An overhead door rolls up and back along horizontal tracks near the ceiling, and the opener, the springs and the door itself take space. Open the door fully before you mark any location and measure the clearance. Keep fixtures at least a few inches from the tracks and the door path, and leave room to work on the opener. Chains on pendant lights swing, so choose rigid mounts near the door. Hang fixtures at least 7 ft above the floor wherever people walk, and higher near tall machines.
When you drill into joists, check what is behind the surface first. Garages often hide wiring, plumbing and gas lines. If you cannot see them, use a stud finder with AC detection, drill pilot holes only as deep as needed, and stop if you hit something unexpected.
How do you power the lights?
LED shop lights are low-power loads: a 40 W fixture draws about 0.33 A at 120V. Six of them draw about 2 A, which is a small fraction of a 15 A or 20 A circuit, so lighting never needs its own circuit by load. The reason to separate it is reliability. If the lights share a circuit with a saw, the saw tripping the breaker leaves you in the dark next to a spinning blade. Put the lights on a circuit that feeds nothing else, or on a circuit that feeds only low-load items.
Many garages already have a ceiling receptacle behind the door opener, and some people plug the first fixture in there. That outlet usually feeds the opener, which means lights and opener share a breaker. It is acceptable for a few LED fixtures; check the opener nameplate and the breaker, and do not use it for a space heater. If you need new ceiling outlets or want a switch, that is electrical work. Use a licensed electrician where your area requires it, and plan a switch by the door so you can light the bay as you walk in.
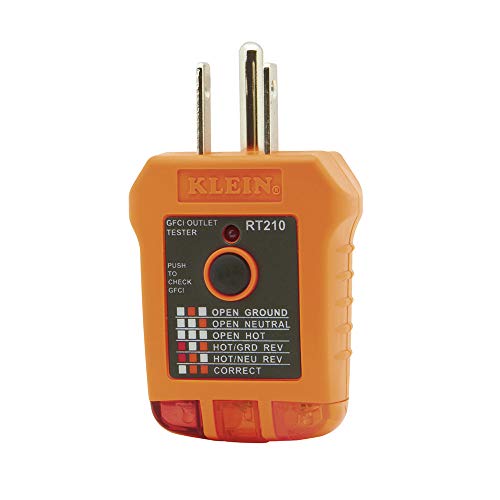
Do not use extension cords as permanent wiring. A cord that runs across the ceiling to a plug-in fixture is a trip, heat and inspection problem. If you use a cord temporarily, use a gauge that fits the load and keep it out of the walking path; the voltage drop calculator checks the cord length. Test every outlet you plug into with a receptacle tester such as the Klein RT210 before you trust it. GFCI protection is required for garage receptacles under the NEC editions most places have adopted; ask your electrician or local building department what applies, and check that the GFCI trips when you press the test button.
Task lighting and special cases
General lighting gets the room right and task lighting gets the work right. Bench work at 100 footcandles is a lot of light to deliver from the ceiling, so add a clip-on or under-shelf LED over the bench rather than doubling the ceiling count. Machines with their own lamps (a drill press, a bandsaw, a lathe, many benchtop tools) are easy wins. The Grizzly T34608 benchtop drill press lists a LED and laser guide, and the Grizzly G0865 bench grinder lists LED lights, so some of your task lighting comes with the tool.
A few special cases deserve attention:
- Low ceilings. Under 8 ft, use flat surface-mount fixtures or tight chains. Fixtures hung below the garage door tracks are a hazard.
- Dusty shops. Sealed or enclosed fixtures stay cleaner. Wipe lenses with a dry cloth when you clean; dust on the lens costs real light over time, which is why the calculator includes a light loss factor.
- Cold garages. LED output and driver life are generally fine in the cold, but check the listing for the operating temperature range.
- Welding and grinding. Keep lenses away from sparks and spatter, and do not hang fixtures directly over the weld table. See garage shop fire safety.
- Finishing. Raking light from the side reveals defects in a finish that overhead light hides. A portable LED on a stand is worth keeping for that.
Four lighting plans by garage size
12 x 20 ft one-car, car in. Six 4,000 lumen fixtures in two rows of three across the width, 10 ft apart, plus one clip light over the bench. That is about 240 W of fixtures, or 2 A at 120V.
12 x 22 ft one-car. Seven fixtures: two rows of three plus one over the bench or the door apron. Paint the walls white and you can go back to six.
20 x 20 or 22 x 22 two-car. Ten to twelve fixtures in three rows of four, with the row over the car side on its own switch so you can turn it off when the shop side is lit. That keeps the electric bill honest.
24 x 24 or 32 x 24. Fifteen to nineteen fixtures. At this size, group them into two or three switched zones. A 9,000 lumen fixture reduces the count to about 7 and 9; use a mix of larger fixtures in the open bays and smaller ones over benches.
Whichever you choose, check the count against the bay in the 22 x 22 woodshop layout, which shows where machines sit, and hang the rows so no machine sits under a gap between rows. The best garage shop lights roundup compares fixtures by tier, and LED shop lights versus garage ceiling lights explains when the ceiling style is the better choice.
Get the garage shop planning checklist
One printable page: measure the bay, count the circuits, list the machines, check the floor. Plus a few short emails, then a couple a month at most.
Unsubscribe anytime. You can also just read the checklist on this site.Frequently asked questions
How many LED shop lights do I need for a two-car garage?
About 10 to 15 fixtures at 4,000 lumens each for general work: 10 for a 20 x 20 ft bay, 12 for 22 x 22 ft and 15 for 24 x 24 ft. Detail work at 100 footcandles doubles the count unless you add task lighting at the bench.
How high should I hang shop lights in a garage?
Hang them at least 7 ft above the floor where people walk, and keep them clear of the garage door tracks, springs and opener. Open the door fully and measure the clearance before you mark any location.
Should shop lights run front to back or side to side?
Run rows across the narrow dimension of the bay, spaced about 1.2 to 1.5 times the ceiling height apart, and place them beside and in front of the work so you do not cast a shadow on it.
Can I plug garage shop lights into the opener outlet?
A few LED fixtures draw only a couple of amps, so it works if the circuit has room, but the opener shares that breaker. Do not add a heater or a tool to it, and have an electrician add a dedicated lighting circuit for a permanent shop.
What color temperature is best for a garage shop?
Around 5000K neutral daylight is a good default for woodworking and metalwork. 6500K is bluer and harsher. If color matching matters, look for a listed CRI.
This page is researched guidance, not professional electrical, engineering or safety advice. Circuits, loads and clearances depend on your house, your service and your town: have a licensed electrician confirm any wiring, and check local code and each manufacturer's manual before you act.